
Henna has been used for centuries by people for body art and/or hair. Using a 100% natural product is the best way to go, and always brings memorable times with its use. This recipe is best used for body art. For use in hair, please read our article on How to Use Henna and Indigo to Dye Your Hair.
Essential ingredients:
- Fresh body art quality henna powder that is finely sifted (please read our article on the times needed for dye release).
- Bottled lemon juice, warm water or tea brew.
- 100% pure essential oils, such as eucalyptus globulus, cajeput, or tea tree or lavender (also known as terps).
- Sugar, preferably dextrose or fructose.

- Measuring the henna powder. Take 2 tbsp of henna powder (about 25 grams of henna), and put it into a bowl. Add 1 tsp of sugar of your choice, and mix well.
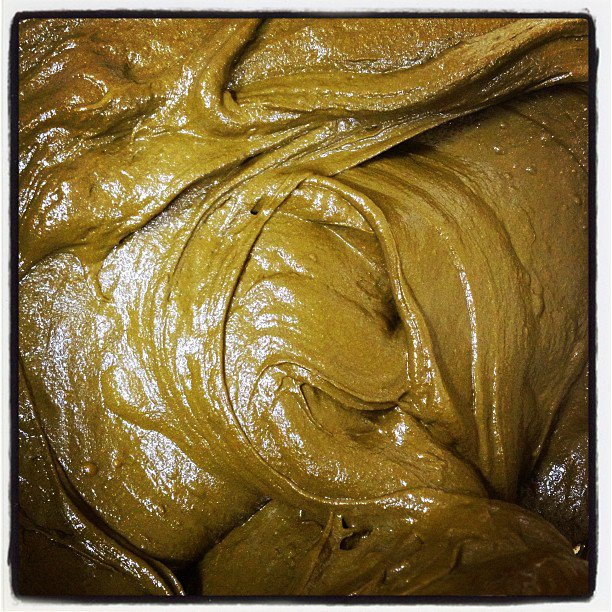
- Adding the lemon juice/water/tea brew. Heat your liquid (about 1/4 cup) on the stove or in your microwave, and add it slowly to your henna powder. Mix well until it is the consistency of play dough/ mashed potatoes. Cover your bowl and let it sit for 2-12 hours (depending on henna powder chosen).
- Adding essential oil. Then add 1 tsp of “terps” (essential oil). Cover again and let it sit for another 6-12 hours. Please make sure to read the article on how to choose the right henna powder for body art as it explains how different henna powders have different sitting periods to achieve proper dye release.
- Testing the paste. Test your henna paste periodically by placing a bit of paste onto your palm and let it sit for 1 minute. Remove the paste by washing off, and see if you have a bright pumpkin orange stain indicating that it is ready to use.
- Second round of lemon juice/water. Add more lemon juice/water (not warmed up) a little at a time and mix well. Do this until you have it to the consistency of toothpaste.
Additional Tips:
- Straining your henna paste makes it extra smooth. You can do this by taking a large cup and placing a carrot bag inside, and then putting a cheap nylon stocking inside that. You then pour the henna paste into the stocking’s opening and pull the stocking through the carrot bag. That way, the henna paste is forced to come through the nylon stocking into the carrot bag. It will be extremely smooth and you won’t have any clogs in your fine tips or cones. What is also good about this method is that, once the henna paste is in the carrot bag, you can easily use that to fill all your applicators up.
- Test your henna paste for dye release as well. Read our article: How to Test your Henna Paste for Dye Release.
- Please do read our aftercare article on taking care of your henna design, to ensure best results.
You can also watch our Secret Henna Paste Video. Enjoy!!


Ruby, welcome! BAQ stands for body art quality.
Jamila has two brand a body art one and a hair one. Tea tree and lavender are both equally good but lavender is more mild and less chances of allergic reactions. For essential oil it’s 1 tsp per 25 grams of henna powder
Thank you for your post Hannaya, and for trying out our henna body art recipe 🙂 Enjoy!
Hi..
do u know what is best to do if mehndi comes out with light stain?? are there any “tricks” to darken the stain? I tried something new from my recipe and usually get good results but this last batch was light. thanks, Ruby
I am just getting into henna services….I need to know where to buy the powder from a reputable company….how will I know if it is fresh?
Hi Ramona. Fresh henna powder and paste would be the best for best results. We highly recommend: http://www.HennaSooq.com and they have over 4,500 fans on facebook
PS you’ll know it’s fresh as all the crop years are marked in the description. The best henna for body art is Henna Sooq’s Supreme Blend or Red Raj
Hi,
I just finished watching your recipe video, and have a couple questions.
a) How long should you boil/simmer the water with lemon juice, cloves, and tea bags?
b) Because the paste takes roughly 24 hours to be fully completed, is it okay to put this water in the refrigerator during this process?
c) After making the paste and taking out all the debris, what is the best temperature for storage?
d) how long does the paste last?
Thank you for your response! 🙂
Thanks for your post Himani.
a. I only bring it to a slow boil and then shut it off and then let it sit. I let it sit and steep until it’s warm. So this might take anywhere from 20-30 minutes depending.
b. the paste now takes only 6-8 hours max, sometimes up to 12 hours but no longer needs overnight or 24 hours usually for the most case. Our newer crops of henna powders since 2012 need less time. Yes you can put your liquids in the fridge but not the paste.
c. the best way to store your paste is inside a carrot bag, cones, or bottles in the freezer for up to 4-6 months.
d. paste can last 4-6 months with proper storage. Do not store your past in fridge as after 48 hours or so it starts to demise.
I hope this helps
Henna paste in the freezer will last up to 12 months.
Hello Shahida, we recommend you place your cones in the freezer my dear. Yes they become frozen solid but a cone taken our of the freezer to use only takes about 15 minutes to thaw naturally at room temperature. This is what we do since 2005.
In the Indian shops or shops where they sell premade tubes of henna paste they are not all natural henna cones so you run the risk of using an unnatural product. Good natural henna cones need to be stored in the freezer for best results. Many professional henna artists that make their own henna do this OR they make a fresh batch every time. Since for us we do henna at shows where there are thousands of people we also have to make large batches of henna cones at a time and freeze them so we have enough for a large show.