
Have you ever prepared henna, let it sit out for dye release only to have a paste that doesn’t stain? As all henna powders have their own dye release timings, you’d think that all will go well– until the paste does not stain. There are a few variables involved that can skew the henna dye release times. Here’s a mini guide to testing your henna paste for readiness for both body art and hair use.
All henna powders have a dye release time; some have shorter release times, while others require much more time to release. Dye release is the amount of time a henna powder needs, when mixed into a paste, to become ready to use, meaning the dye is ready and at the perfect height in color.
It’s best to remember that dye release times are simply a guideline for the specific henna. Fresher henna powders typically can release much faster than older powders as well. As well as freshness, other variables that can speed up and slow henna’s dye release down such as the ambient air temperature, liquid temperature and use of acids in the mix. Heat can speed up henna’s dye release while acids and cold air/water have a habit of slowing the dye release down. There have been a few reports where hard water can slow down and even prevent henna from releasing. If you live in an area that has hard water, or have not been successful with dye release, try to mix your henna with an herbal tea made from distilled water which lacks the minerals that can interfere. Another option for hard water areas is to add 1-2 TBS of lemon juice to the liquid before mixing the henna paste. Irritation and dryness have been reported by those who have used lemon juice as their sole mixer due to the very low pH of the lemon juice (pH of 2) which is far too low. Henna happily releases at a pH of around 5.5, which is the pH our skin and hair prefers.
Adding thick substances like honey, heavy oils, yoghurt, and butters before dye release can interfere with dye release itself. Try to add these ingredients right before application. Hard butters and oils (except coconut) should always be melted and blended with a more liquid oil, and honey is best dissolved into water then added to the henna paste.
Testing Henna Paste for Readiness
Testing henna paste is very easy. Once you’ve become used to testing henna this way, it’ll become second nature. It’s best to test every batch of henna you make, as mentioned above, ambient air temperatures and water temperatures can change the readiness time of your henna. To test your henna paste:
- First make sure you have allowed your henna paste to sit for the recommend dye release that as directed by our brand
- Dab a little paste on your clean palm
- Let the paste sit on your palm for up to 5 minutes
- Wipe/wash off and take a look.
This method assures that you will get optimal dye release from your henna. Happy hennaing!


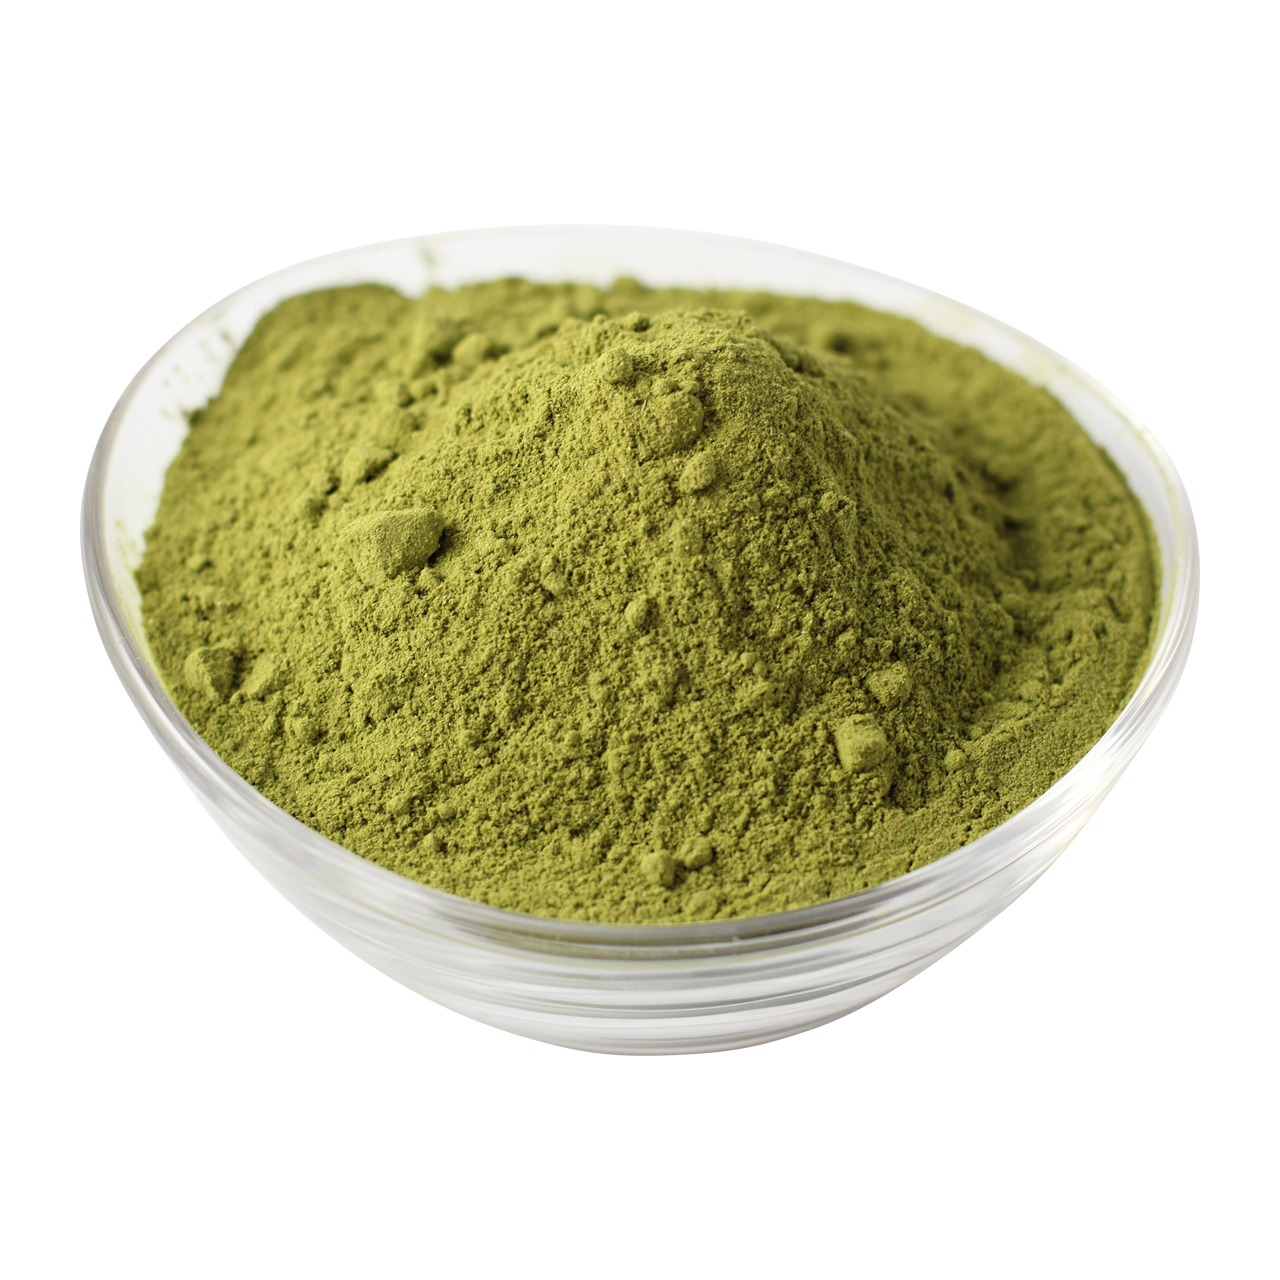
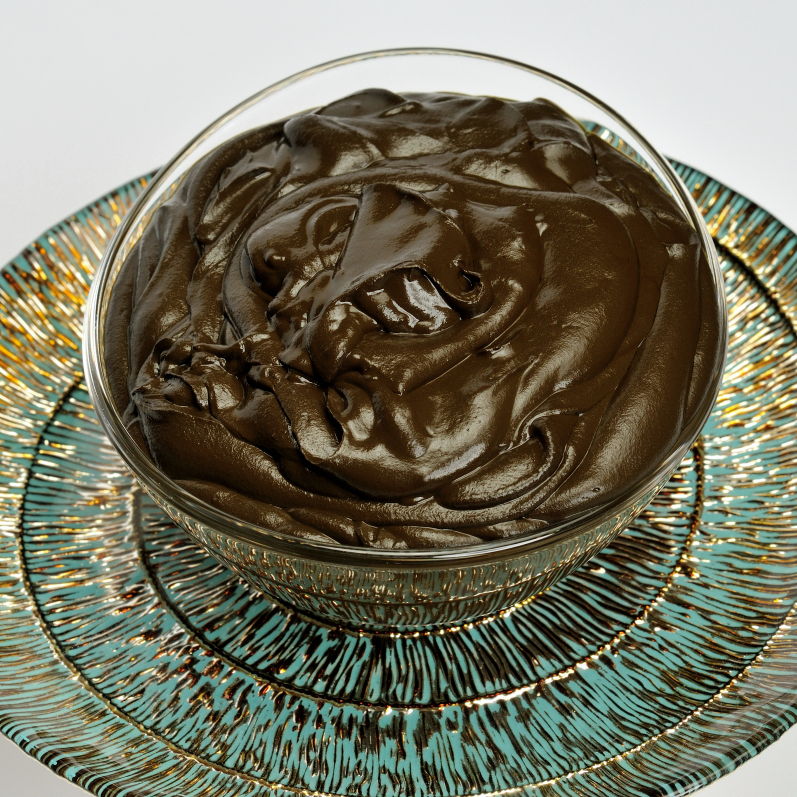
Just a suggestion. With regard to the colour after dye release. Whenever I see pumpkin orange I think it’s ready which could be minutes after. With time I figured it meant a dark pumpkin orange or a stronge pumpkin orange that we should wait for. Maybe we could clarify or change the wording.it might be just me since there’s a difference between orange and pumpkin orange
Thank you
Hi there, Hiba!
Thank you for the suggestion! That’s a good idea- ‘dark pumpkin orange’ it is! There is a testing stain comparison photograph on it’s way.
Hi, You said Red Raj thrives after freezing and defrosting twice. I just want to make sure I understand what you’re saying. I interpreted this to mean… mix my paste, put it in baggies freeze. defrost, then freeze again. Defrost when ready to apply. Is this correct?
Hi Sharon,
Basically, I was trying to point out that the Red Raj can in fact survive being frozen and defrosted twice (as someone accidentally found out when they defrosted their Red Raj and ran out of time to apply), but RR doesn’t actually need to be prepared as such. It can be mixed released then applied, or mixed release frozen defrosted and applied. It’s entirely up to you- Your henna, your way! 🙂
Are there any tips are tricks to perfecting dye release for Jamilla? I’ll be adding hibiscus to increase the red potency and using pomegranate juice or red tea for my liquid. Not sure yet. Any advice?
Hello Marie. Thank you for posting. Everything you’re doing sonds great. Just let it sit for 3-4 hours for dye release and then apply/use it on your hair. Enjoy!
Is it possible to achieve near instant dye release when using warm – hot liquids? I’ve mixed up henna twice now, and while I’m mixing, I notice a dark pumpkin-orange stain on my fingers within 10 minutes or so after adding liquid (plain water, no lemon juice or acidic liquids). Is this classified as maximum dye release?
Tasnim yes it’s possible especially with henna with a very high dye content or fast dye release time. Usually that tone is yes considered a fast dye release and it should be ready as long as it wasn’t pushed too quickly with a too hot liquid or else it won’t last long.
I didn’t know that about freezing. I was wondering why the paste seemed to do better after I froze it.
Thanks for the info!
Thanks for the info on what dye release means, Vanessa! I kept seeing it mentioned in coments under Red Raj, but wasn’t sure.
It’s also good to know that if liquid added is too hot it may push the dye release too fast and the colour may not last long. At least that’s what I read into your comment, Khadija. I was using cheaper hennas for many years, which instructed to use hot water. Now I know better! I did get an amazingly gorgeous deep red on my first use last night. I’ll see how long it lasts because I did use hot water, before I read this blog post. Henna Sooq rocks! The only sooq I’ll be using for my hair needs from now on!
I’ve been reading a lot about dye release as I’m doing my first henna, and yesterday I tried the testing as described in your very informative article 🙂 I made a mistake leaving one of the tests on my palm for 7 min (others left on for 5 min), and that spot is much darker than the others. My problem now is that I don’t know if it’s darker due to perfect dye release or because I left it on a little bit longer than the others. I tried the paste every 30 min or so for about 5 hours, and none was dark like the one left on for 7 min. Also wondering if I can freeze the paste (Jamila for hair) right after I’ve mixed it, and take it out and defrost it the next day and have perfect dye release once it has defrosted?
It’s probably darker because you left it on longer. The longer you leave henna on the skin, the darker the stain. Yes you can freeze and defrost and then check for dye release again to be sure
Most recipes and websites I’ve seen say to leave the paste out at room temperature for at least 12 hours, and to use pure lemon juice as the mixer.
I’ve had good results with this method, and I’m curious as to why the paste is tested so soon after mixing.
Thank you for your post Chelsea. This is tested so early on for mainly hair coloring recipes. Sorry for the confusion. For body art we mostly test for color at about 6-8 hours. I’m not sure about “most” websites or information out there, but I’d recommend you check the dates of when those information, and recipes have been posted. Some information is out dated. But some are just a matter of personal preference. It’s completely up to the artist to decide on what recipe works best for them. I personally am always tweaking my recipe here and there, especially since we carry so many henna powders, I’m always playing 🙂 Have fun!
I have been using henna for about a year and a hlaf on my hair and i have found that any type henna loves freezing. I mix only with water, nothing else, let sit for 24hours to release and after time elapsed whether the release was good or bad, i freeze untill i need to use it. I find that even if i were to use right after optimal release has happened, the stain is not as dark or strong as if i were to freeze and defrost before applying to my hair. I looooove the deep red i get after freezing process 🙂
SO I have a question. Can I speed the relese of henna dye by putting it into a bowl with a plastic wrap and slowly heating it with a hair dryer for hour or two?
Thank you Neja. We wouldn’t recommend you attempting to speed up the dye release as that may cause it to move too quickly and then crash and therefore not resulting in good color results. You can usually let our henna powders sit for only 3-4 hours and then they are ready to use.
What happens if I leave my already mixed Red Raj sitting out for more than 12 hours? Also, Is it possible to just refrigerate and not freeze to slow down the dye release before I’m ready to use it? It’s currently been sitting for 5 hours and I’m unable to get to it to take care of it for a few hours yet.. Aahhh help, please? 🙂
Hello Erin.
If you leave it sit more then 12 hours the henna powder does tend to lose a lot of the dyeing power. We recommend Red Raj sit only 3-4 hours. If you place it in the fridge during those 12 hours of starting time that does slow it down a lot and can allow you to keep it in the fridge for at least 24 hours I’m sure of with getting good dye from it still. If you ever do have an urgent message since some replies can take up to 48 hours, please call us at 410-579-4543
So, my henna isn’t changing color. This is my first time making the paste and I’m hust unsure about some things
Good morning Sharron. Thank you for your message. Which henna are you using and what color change are you looking for? Like with the paste itself? This is what you would look for and how to test your henna paste for dye release: https://hennablogspot.com/the-deal-on-dye-release-testing-your-henna-paste-for-a-more-effective-stain/
Hi. I need to colour my hair burgundy. So I have mixed indian henna with fenugreek powder, cloves powder, coffee, powder. Seived this mixture so as to remove any lumps with juice of orange and beetroot. How long should I keep it before I apply and how long should I keep the henna on the hair before I wash. Is this the right composition for burgundy hair colour. This is the 1st time I am applying henna. Please advice
Hello Blazia. Indian henna like our Rajasthani Indian henna powder (http://www.hennasooq.com/fresh-organic-rajasthani-indian-henna-powder/) is a great choice for burgundy tones. You should let this rest for max 3-4 hours and then leave this in your hair 3-4 hours. Then wash out. I hope this helps.
Yes you can mix your henna with chamomile tea and lemon juice if you’d like. Let us know how it turns out.
Hi, I have mumtaz henna for hair from India and I want to use it as soon as possible. How can I speed up the release time? Thank you in advance
question, which brand are you using? have you ever used mumtaz henna for hair? that’s what i have and would love to freeze for at least 4-6 weeks for touch-ups on my roots.
Personally I love our Red Raj for hair and body art use. I don’t use other brands as we already carry our own. 😉
I thing I made a mistake! I mixed my henna with boiling hot water and covered it for 6-8 hours. When I checked it, it was the same green as before, no change in color. Should I just trow it out or freeze it? Thank you
Good morning Dakota. You can test some on your palm to be sure. Boiling hot water migth have possibly killed the dye but the palm testing of the paste will show you for sure.
Good day Tiesha. Thank you for your post on our blog. Sorry for this delayed reply. Did you end up using it and what were your results. In the future boiling water or liquids aren’t a good idea as they push the dye too quickly and it can crash.
Great! Thank you for sharing and letting us know how it turns out.
Hi. Sure you can mix any essential oils you’d like. Maybe do just avoid citrus oils as that can cause some light sensitivities. You can freeze your henna paste cones for up to 12 months to make them last and preserve them. The freezer always works but you can’t bring it in and out of the freezer several times as that is when it starts to lose the color. Lemon juice and water are both what we use. If you freeze your cones the water won’t gather either.
Bought red raj for the first time and am disappointed thus far. I’ve never had an issue with getting the dye to release after years of using jamila, but for some reason I can’t get the red raj to stain beyond a very faint orange. All I’ve added is some hot water and lemon juice, and it’s been over 12 hours now. I’m freezing it for now and will try thawing it out tomorrow, but right now I’m feeling like I tossed away nearly 20 bucks. Is there something I’m doing wrong? Is red raj supposed to be mixed differently than jamila?
Hi Rin! You may have recently left a review which I also left a comment on but wasn’t sure how else to reach you. Thank you for leaving a message here about your concerns with Red Raj. Please let me know how we can help you once you review my reply below.
Here was my reply: “Thank you for your review. One important part of your review is that you let it sit out overnight. Is there a reason you didn’t follow the steps we recommend on the back of our package for our Red Raj? Every product we carry and especially our Red Raj is not like other brands or products out there. It’s very important to follow our directions to ensure best results. Red Raj needs to sit only 3-4 hours for best results not overnight. Letting it sit out overnight, unfortunately you’ve allowed the dye to demise. Your end results are what occurred for you. Should you have other questions or concerns please do feel free to reach out to us directly. We support out clients and want them to have 100% success with our products.”
I’ve read so many people’s suggestions about getting henna to work that at this point I’m confused. Some say to freeze it over night (already mixed with water) some say to let it stay in a heated environment (on top of a stove, window sill, inside a warm car..) I just mixed it with Sparkletts drinking water and allowing it to sit in a Correlle bowl covered with plastic wrap. Will that release the color?
Hi Catlady! Great to hear from you. Would your use be for hair or for body art? The timings vary between both. So far what you’ve done sounds good but how long did you want to let it sit out for dye release? What liquids do you like to use?
I froze my henna immediately after mixing with the acidic component. Do I have to let it dye release before mixing with indigo for use?
Once your Henan thaws it should be releasing typically as the thawing process could take a few hours unless you only froze a small amount. Let it sit at least 2-3 hours to thaw/achieve dye release in this case. Then you can mix your indigo and add it.
If these were our products then you should be fine. We don’t have metallic salts nor additives in our powders which do not conflict with stainless steel. Personally I love using stainless steel and it’s much easier to clean since they aren’t porous as well.
Thank you Ruby!
Sometimes we use lemon juice for acidity but not always. Distilled water is more gentle and works well for the color for our products.